Forest Pack Pro review
Adding variation
In order to help make things look natural and realistic, Forest Pack Pro offers the ability to randomize the scale, rotation and translation of each object. This is one of the most basic features expected from scattering plugins, the only thing that gives Forest Pack Pro a little edge is the mirroring option. If you want to, you can also use a map for determining scaling and rotation.
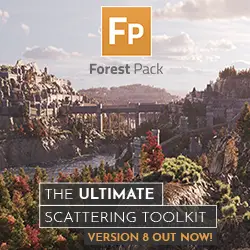
The Forest Color Map in action
Variation can also be added through materials. There are two ways to do this: a simple gradient tool that’ll modify existing maps, or the awesome Forest Map. This is a really great option, with this map you can mix a bitmap and a gradient (or a color), but the best part is that you can choose to do it per leaf, per tree, or both! With this option each leaf and tree will be different. You can also load multiple bitmaps and distribute them randomly.
Forest Pack Pro can handle animated objects and it allows adding a time offset to the animation in order to keep things non-linear.
The Tree Editor
When you use random distribution in a scene, you’ll probably get something that looks good, but if you have a master plan to stick to, it’ll need some tweaking. The Tree Editor is there to give you that flexibility. It allows you to deal with each object, so if you need to focus on some trees at a specific place you can. It will let you scale, rotate, delete and move one object, or groups of scattered objects.
This is a really nice option because it gives you a simple way to handle a single object with a few clicks and it doesn’t kill the RAM optimization provided by Forest Pack Pro. Distribution settings won’t be available after using this feature but viewport settings still will. Using the points cloud display in combination with this is a real pleasure.
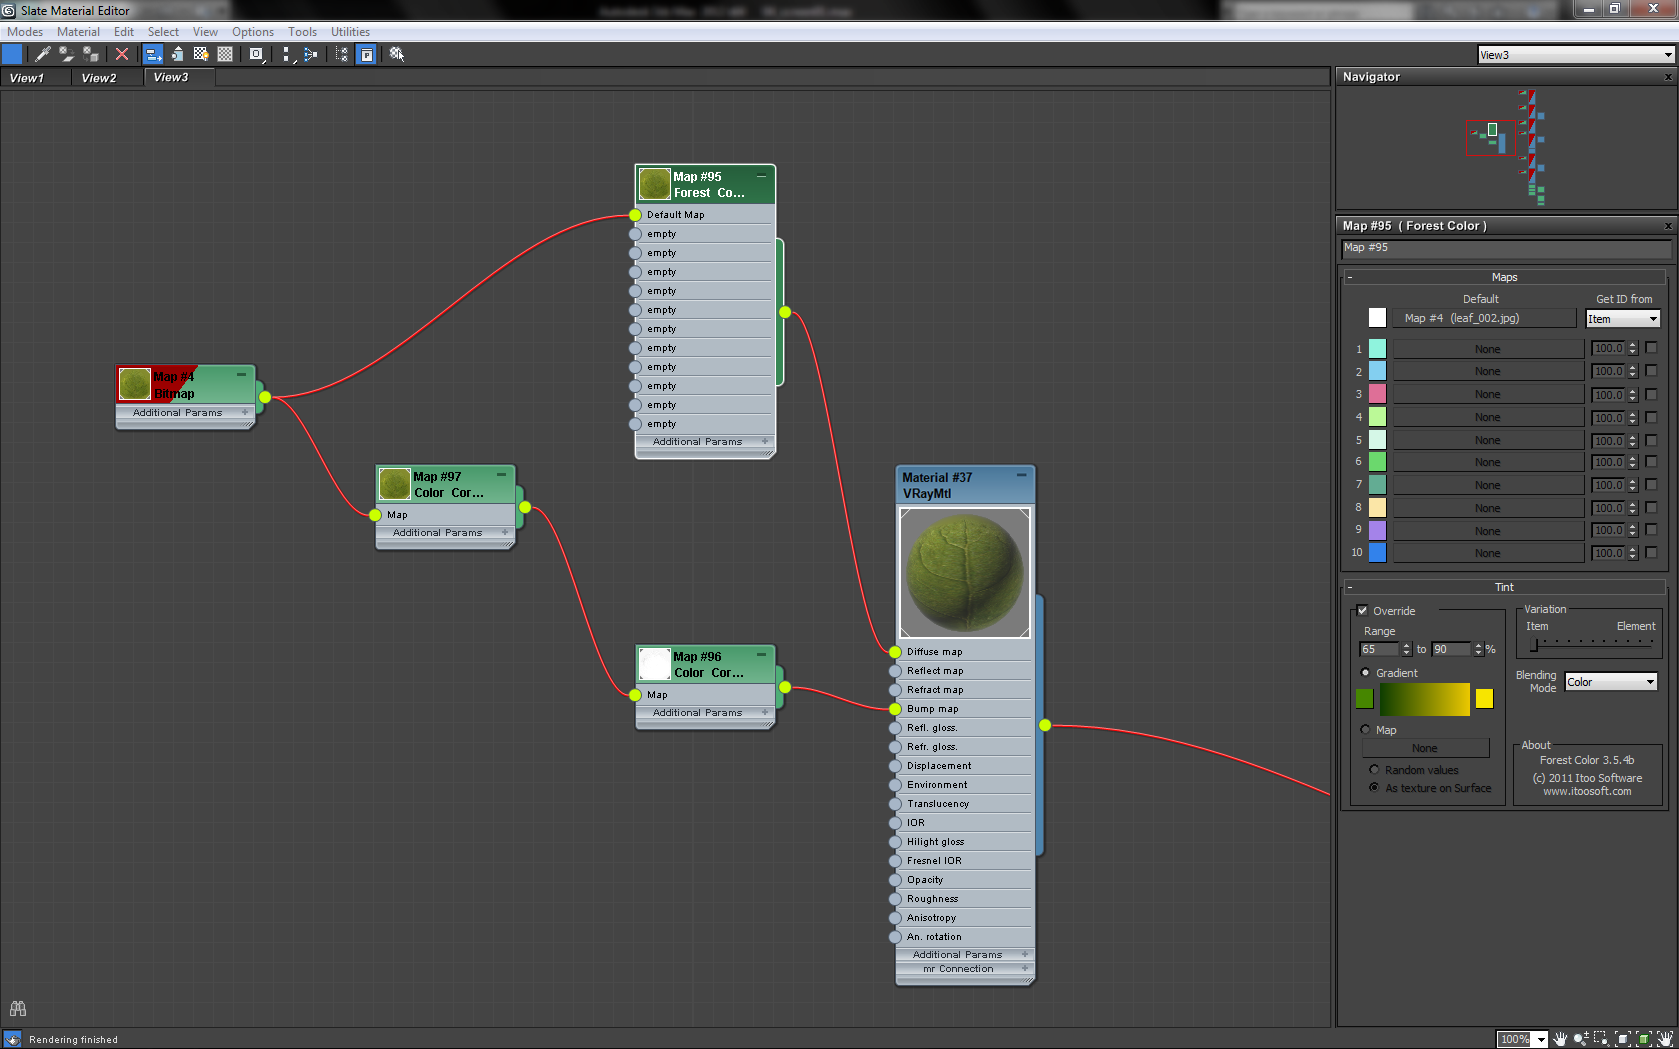
Camera and Display options
The Camera panel offers two important features, one for planes and one for custom objects. Forest Pack Pro can rotate planes automatically, so that they are always facing the camera.
Keeping render times at bay using realtime camera clipping and limit to visibility options
The second feature is “Limit to visibility”. With it, trees are only created where the camera can see. There are also some clipping plane and density falloff options, these are very useful for reducing RAM usage and keeping render times as low as possible without losing density of scattered meshes.
A small problem with this function is that during a fly-through trees can disappear at the border of the frame. The pivot point is for Forest Pack Pro the point of interest of each mesh and when you’re working with big trees you will need to use the expand parameter to resolve this. But it won’t always work, depending on the size of the object and the pivot point. I’d love to see this handled automatically by the plugin.
Camera options also offer the possibility to cast fake shadows from 2d objects.
The Display panel lets you choose the way you want to see scattered objects in the viewport. The points cloud display is a really nice way to see objects while working with clusters or with the tree editor. You can also limit the number of objects visible in the viewport, and use simple geometry replacements (plane, box, pyramid, etc.).
Something that could be improved regarding display options is adding a feature currently offered by Multiscatter (another widely used scattering plugin) that allows you to toggle scatter objects on/off through the utilities panel in 3ds Max, or select them without having to switch viewports.
Handling RAM issues
Forest Pack Pro allows you to administer RAM usage through its statistics option (General panel). This will help you resolve related issues that may surface. If there is a problem with a render, it will pop-up showing how many mesh instances Forest Pack Pro is managing, and it will also provide a brief description of how to resolve the issue.
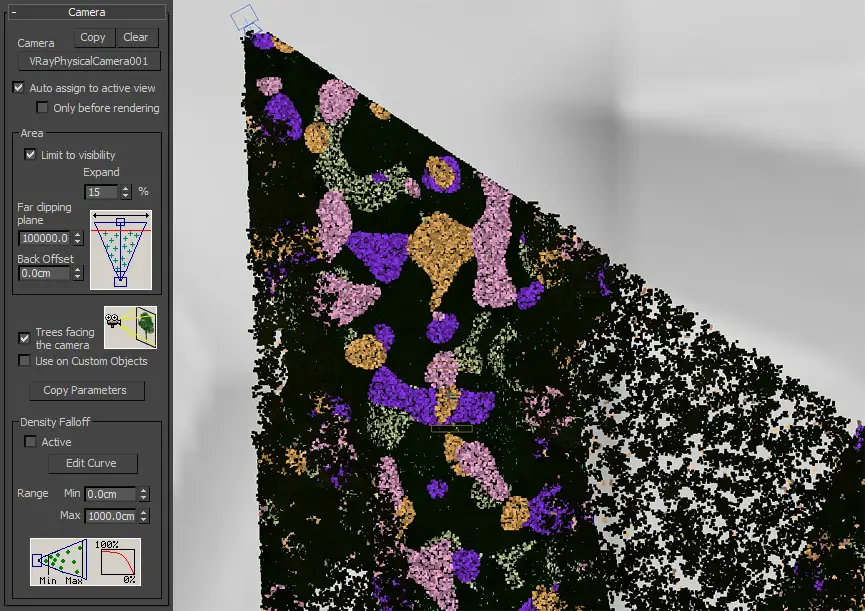
Forest Pack Pro Library
The Library Browser is a tool to quickly add plants to your scene, and you can of course save your own models to the library. The latest release of Forest Pack Pro brings a number of free 3d models courtesy of Konstantin Kim’s 3dmentor.ru. I’ve used these models for most of the scene I created for testing the plugin, I just added some trees from another collection. At Konstantin’s site, there are also some free grass and flowers available.
Forest Pack Pro Library Browser
The test scene
Now let’s see how all the features discussed helped me create the test scene:
– There are two grass types. Modeling looks the same but rendering does not. I’ve used the Forest Color Map with a gradient but with solid colors inside.
– There are 6 kinds of flowers, these are actually three colors combined with two kinds of flowers. I’ve made this to show how clusters can be useful to group objects without having to use multiple Forest objects.
– For trees, I’ve used five tree models. Those all have the same Forest Color Map for leaves. I’ve used it to obtain a little variation on each tree. I really love this feature, it’s fully integrated to my workflow with Slate. You can also use it to load multiple bitmaps for the diffuse channel, it looks like CGSource’s MultiTexture map, a must use feature of Forest Pack Pro!
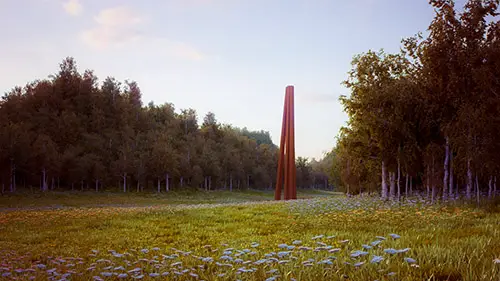
A scene created for testing the plugin’s performance by Matt Guetta.
The sculpture depicted is a homage to French artist Bernar Venet’s “Neuf lignes obliques”.