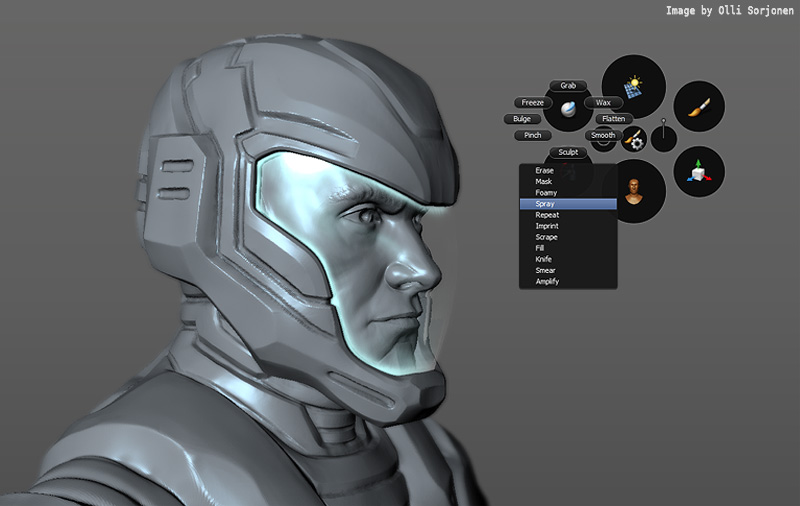
New Brushes and Brush Options
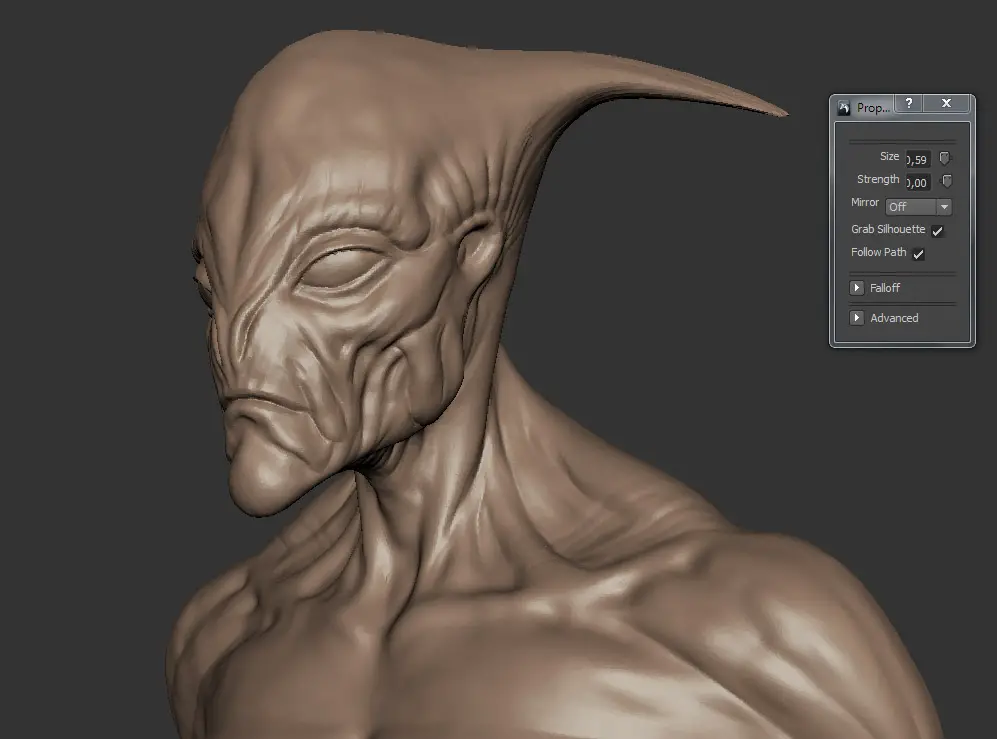
“Grab Silhouette” allows to edit the silhouette of an object more easily, “Follow Path” provides similar functionality to the SnakeHook in ZBrush
Mudbox 2010 and 2011 added some brushes that tried to catch up with the brush functionality of ZBrush 4, but in Mudbox 2012, instead of adding brushes, both significant and small improvements have been made to the painting and sculpting toolset. You can now apply a single brush stroke across multiple objects and new falloff options have been added – Falloff based on Facing Angle lets you adjust the effect of a brush based on the difference of surface and camera angle, this can be used to adjust behavior of the brush close to the silhouette edges and creases on a object, for example.
Grab brush performance has been improved and mirror limitations in earlier version have been eliminated, according to Autodesk. Two new modes of operation have been added to the Grab brush – You can now use Grab Silhouette to manipulate the silhouette edge of a model and use Follow Path option to pull tentacle-like shapes from an object, very similar to the SnakeHook in ZBrush 4.
Ptex and Create UVs
Mudbox 2012 extends UV mapping-related features in a major way. It now offers UV creation tools and support for a UV-less workflow with Ptex. Developed by Walt Disney Animation Studios, Ptex (Per-Face Texturing) is an open source system that provides the ability to paint textures without UV mapping. Ptex assigns a texture to each base face and no user created UV coordinates are required. The setup for Ptex painting is very easy, you just select Ptex Setup in the Mesh menu and you’re ready to go. Not having to go through manual UV creation is especially great for sketching and trying out various concepts.

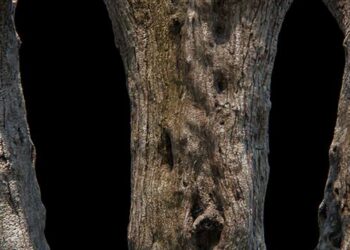
Preparing a model for PTEX painting is very easy and straightforward
Ptex textures can be currently exported in native Ptex format, which can then be rendered in software that supports the Ptex format – currently support in Autodesk products includes VrayPtex (3ds Max, Maya), Mankua’s Stripes (3ds Max), RenderMan (Maya) and the Maya Hardware Renderer v2.0. As the Ptex format is quite new and lacks support in many commonly-used applications (such as Photoshop), Mudbox can bake Ptex textures into UV coordinates and export them as typical image files.
The new Create UVs option automatically produces UV mapping for an object. The results, however, which are similar to ZBrush’s automatic mapping, are not usable for manual painting in Photoshop. No tools exist currently for modifying UV mappings, but in some situations you can use it to avoid manual UV creation outside of Mudbox 2012, which is a great improvement from earlier versions.
Transfer Details
The new Transfer Details tool (in the Mesh menu) lets you transfer properties from a high resolution object to another with different topology, point order and UV mapping. This can be very useful if the topology of the object you are working on has been changed for some reason, so you can use this tool to transfer all the surface details and textures quite easily to an updated object.
Paint Layers and Blend Modes
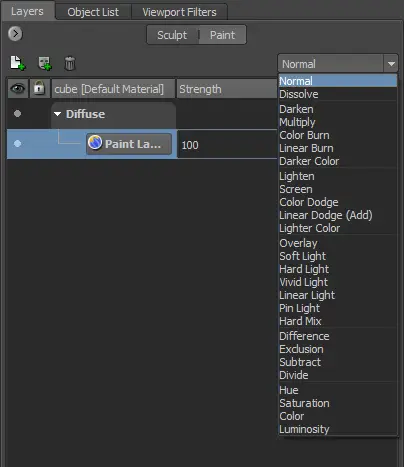
New blend modes extend the possibilities to combine layers and enhance compatibility with Photoshop
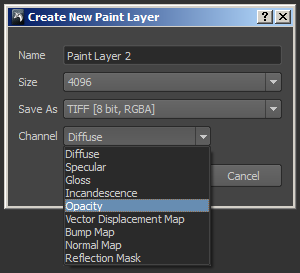
An Opacity channel can now be created for paint layers, allowing you to paint transparent surfaces
Combining different layers of paint is now much easier and powerful with the help of over 20 new additional blending modes, all of which are very similar to Photoshop’s. Paint layers can now have masks that let you hide and reveal parts of a layer, and you can select a blending mode for the layers, which makes it a lot easier to apply logos, cracks and other details to surfaces in a non-destructive way.
Transparency (Opacity channel) support has also been finally added – transparent surfaces can now be created with the new Opacity channel paint layer and an opacity option has been added to material properties, so you can now easily visualize surfaces such as eye glasses and translucent membranes in your scenes, which is a great improvement for character and vehicle design, among other things.
Improved layer support makes it easier to seamlessly import and export layers between Mudbox 2012 and Photoshop. You can now export multiple paint layers from your scene using the Export All Paint Layers option. The Solo option lets you isolate selected paint layers, automatically toggling off all the other layers. The Solo as Diffuse option, in turn, lets you display selected layers as flat color to make it easier when painting opacity, bump and other layer channels.
However, when you use the Export Channel to PSD command, you can’t export a layer’s transparency to Photoshop. Luckily, you can export and import layer masks with the Import Layer Mask and Export Selected commands. It would have been a lot easier, though, if you could just export the whole set of layers and masks to Photoshop automatically.
Multiple paint layers can now also be transferred from one object to another using the Transfer Paint Layers option in Extract Texture Maps window.
Large Texture Datasets
Mudbox 2012 improves support for large resolution textures and has better tile management. This lets you work with ease on complex objects such as vehicles or aircraft that might have hundreds of different textures, without being limited by your system’s or graphics card’s memory.
The Subscription Advantage Pack has added a “Gigatexel Engine”, which enables painting of huge textures in Mudbox. Since this feature is only available to those on subscription and will be accessible by the public at large in Mudbox 2013 it was left out of the scope of this review.
I would like to try to make the Helmet on the front of this website By Olli Sorjonen.. My question: is there a Tutorial for the Man in the Helmet ?
Thanks