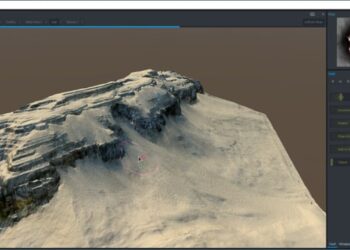
It’s a pleasure to present you our latest in-depth review, digital modelers and CG artists Olli and Sami Sorjonen take a thorough look at Pilgway’s 3D-Coat sculpting and painting software: “… an affordable Swiss Army Knife for sculpting 3D models.” Read the review.
3D-Coat 3.5 review
Related Posts
Recent Comments
- OccultMonk on 3ds Max 2027 released
- OccultMonk on 3ds Max 2027 released
- Ardian on 3ds Max 2027 released
- Bruce Hart on 3ds Max 2027 released
- eloi on 3ds Max 2027 released
Popular Stories

CGPress is an independent news website built by and for CG artists. With more than 15 years in the business, we are one of the longest-running CG news organizations in the world. Our news reporting has gathered a reputation for credibility, independent coverage and focus on quality journalism. Our feature articles are known for their in-depth analyses and impact on the CG scene. “5 out of 5 artists recommend it.”
© 2025 CGPress



You state in the review: “you cannot create directly a single ngon to cap a hole”. This is incorrect. Hold down the Shift key and you will create an ngon cap.
Corrected. Thanks for the note.
Great review. I’ve just finished work on a feature using 3dCoat for texturing environment assets, and I’d have to say it worked extremely well for this purpose. The layer/channel set-up needs to be standardized, but it’s workable. Mainly, the stencils and masks work very well and the range of paint tools and layer adjustments like hue/sat/lightness meant I didn’t have to use Photoshop at all, which is a first.
You made some good points, but also a few inaccurate ones (in my opinion). You said there were no levels of resolution in voxels, just the ability to downgrade the volume. I think that statement can be rather misleading to a reader who knows little or nothing about the application.
Multi-Res effectively allows a user to step up and down levels (4 in all…current and 3 levels lower) of resolution the way they would stepping through their subdivision levels with Mudbox or ZBrush. It switches to Surface (polygons only) mode in the process…so there is no volume DENSITY to speak of…and creates a decimated/lower poly version of the model (Proxy), to work on. I have them mapped to my arrow keys, to emulate the Page Up/Page Down hotkeys in MB. Up arrow to toggle into/out of Proxy mode, and the 3 bottom arrows for the 3 levels of degradation.
Granted, its not quite as elegant or as versatile overall compared to the methods in other prominent applications, but it works and does so extremely well. Sculpting on the proxy is extremely fast.
You also stated that one couldn’t reach high levels of detail in Volume mode. That’s absolutely untrue. It can reach as high as your system allows. I have a 6 core cpu with 16GB of RAM (not really a high-end system), and I have little problem reaching high levels of detail (20-40 mill+ polys). Plus, performance is still very good until you reach a given brush radius threshold. But that’s where Surface mode or Multi-Res tools come into play.
Working on super dense meshes in MB and ZB have their limitations too, so I don’t know why 3DC can’t get more credit in this area. Voxels have their own unique benefits (flexibility and forgiving nature), and tradeoffs. The same can be said about sculpting with polygons.
One can also further manage their system resources in a similar fashion as is done in other applications. Namely hiding sub components/layers and usage of SubTools.
The way it works in 3D Coat (Voxel Room) is to split segments of the model into discreet layers. One can directly export that layer as a .3b (3D Coat native) file…among others, and subsequently delete it from the scene until ready to merge it back in.
Another option is to cache the layer or drag and drop it into the Model Pallet, where an OBJ file will be created, along with a thumbnail. Again, the layer can then be deleted from the scene, to keep RAM usage low, and thereafter merge the object back into the scene (much like SubTools in ZB), when ready.
Additionally, I was very surprised not to hear any word about the work underway on “LiveClay” (via dynamic subdivision) which even in this earliest available beta (3.5.20) stage, lets an artist reach ridiculously high levels of detail and with impressive speed. That would have made a major difference in reader’s opinions. Anyone trying or buying 3D Coat now has access to that new build.
You also made 3DC seem inferior to Mudbox’s Painting toolset. There are indeed a few small things that Mudbox has in it’s favor, with regard to 3D Painting, but so too does 3D Coat. Mudbox didn’t even have texture painting until 2009 and had no blending modes for layers until 2011. Even then, there were only a few modes to choose from. As of MB 2012, they finally have a full set. 3D Coat has had them for years. Also, with Mudbox, you can only paint one layer channel at a time. One layer for diffuse, one for spec, etc. The ability to paint all three channels simultaneously is huge, and was overlooked in your review.
But the real magic in 3DC’s Painting toolset, that was glossed over, was the live Normal map/Displacement map detail one can paint with. It’s a solid alternative to sculpting in Voxels in certain circumstances. It’s more efficient (with System resources) when creating uber high frequency details.
It also allows one to sculpt detail in layers, much like one would in MB.You can load materials/stamps into the material pallet with their diffuse/bump, displacement, normal map/specular included.
You also stated that there was no way to view the different channels in the Paint Room. That is not accurate either. One should have the Texture Editor open in the Viewport at all times, when working with painted textures. With it open, there is a little drop down list in the top right hand corner of the editor, that displays whatever channel you want.
You can dock the editor and resize it however you please. It’s like having Photoshop open inside of the 3DC viewport. I think Andrew should create a little icon for the Texture Editor, perhaps at the bottom of the tool pallet, that toggles it on/off quickly…It’s one of the hidden gems of the painting toolset as well as the Image picker.
The Pose Tool also recently received a new freeform deformation cage, that makes it even more versatile. You made it sound useless, and I find it far from that, especially given a new FFD cage that went unmentioned.
With all of this being said, I wish anyone doing future reviews would give Andrew the courtesy to submit their misgivings about 3D Coat to him first, before publishing (possible) inaccurate information that could adversely affect a reader’s purchasing decision.
It was a good informative review overall, but if you had allowed Andrew to respond to the negatives you mentioned, it could have been all the better. Nonetheless, thanks for taking the time to write it up.
Best Regards,
Don Nash
well said and good explanation.Don ~