Introduction
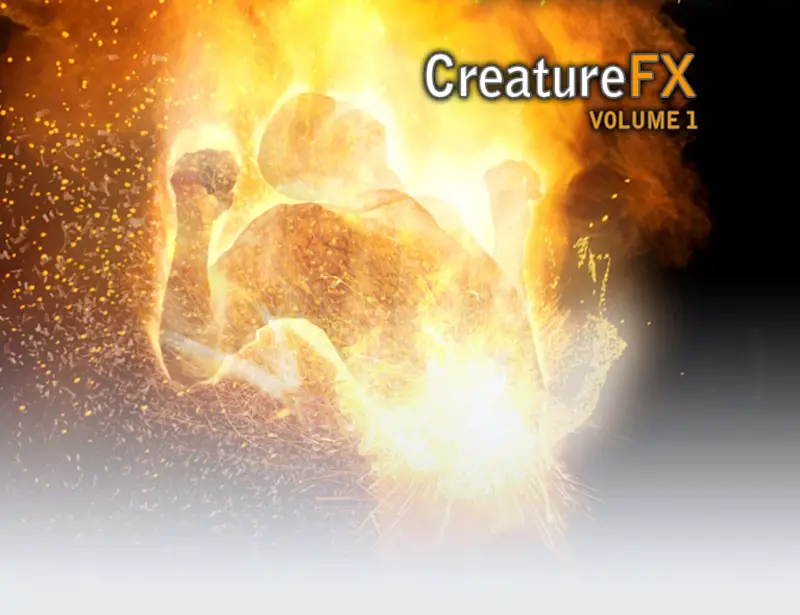
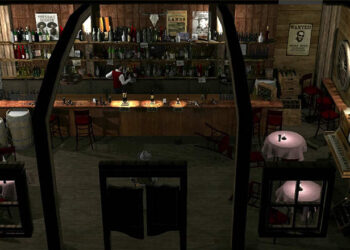
Allan McKay, a well known Australian artist, returns with a new training DVD called Creature FX Volume 1. The DVD is part of a series, aimed at building production FX for character and organic-oriented shots. In this first volume, Allan creates a disintegration effect sequence from scratch, which could be described as a vampire being hit by a bullet that turns him into a flaming torch and eventually into a pile of dust. It’s similar to effects seen in movies such as ”Blade”.
The main tool of choice is once again 3DS Max for the creation of 3D render passes and effects. Particle Flow is used for particles, procedural texturing for character texturing and Mental Ray for rendering. Fluid parts of the disintegration effect are created with Sitni Sati’s FumeFX, and final compositing of the sequence is carried out in Eyeon Fusion.
The DVD is aimed at intermediate to advanced users.
Contents
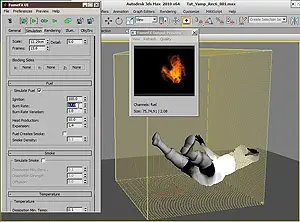
Creating body flames using Sitni Sati’s FumeFX
Tutorials run for 7 hours and 40 minutes (approx.) and are divided into 16 chapters:
1. Introduction (6min) – The first chapter is an introduction to the subject and overview of the project.
2. Particle Mask Generation (39min) – After the introduction, setup of the disintegration effect starts and the shot’s structure is explained thoroughly. There’s also a summary of the shot’s workflow in general, which is a nice addition. Point caching of character animation is shown and the benefits of caching models are discussed.
Basic setup of texturing follows, with Max texturing being discussed in detail (how it behaves in various situations, possible problems when viewing textures in viewports, etc.). The timing for animating the main hit mark texture is blocked.
3. Particle Triggers (32min) – After the initial texture animation is setup, building of a proper shader for the character begins. This includes how to create a burning flesh effect with a displacement map and how to make a burning flame edge effect. Both are discussed extensively.
Around the middle of the video, particle effects creation in Particle Flow begins. Allan shows step by step how to create a Particle Flow setup that emits particles from the edges of the burning effect (which will be later used to create flame particles). The use of the new 3DS Max 2010 ”Birth Texture” (previously available in PFlow Tools: Box #1) is shown.
4. Creating Sparks (49min) – The disintegration effect needs an “exit wound” related effect. This part shows how to setup a spark burst that emits from the character’s backside. Splitting particles for creating a spark burst is shown and also how to organize a Particle Flow view for good readability.
Halfway through the video Allan shows how to set up embers (another set of sparks), which are emitting from the edge of the fire. Creation of embers’ movement and turbulence is explained in detail.
5. Generating Flames (20min) – This chapter deals with the production of a burning effect using FumeFX. A short introduction to Sitni Sati’s software is provided – though if you are unfamiliar with FumeFX, it might be a good idea to go through other tutorials dedicated to the subject before diving into this DVD. An initial burning effect is setup and various settings are shown, with an emphasis on obtaining a visually-appealing result.
5B. Particle Fire (10min) – This chapter starts with a review of everything that has been covered so far. Halfway to the video the tutorial shifts back to Particle Flow. Flame particles are added to the disintegration effect, then follows an explanation on how to make particles emit where fire is burning, based on the setup created in chapter 3.
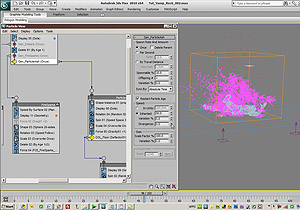
Particle Flow being used to create layers of ash
6. Creating Ash Layers (18min) – Another set of particles is added to the disintegration effect, this time it’s ash. A detailed explanation is given on how to create the look and movement of ash particles using Particle Flow. Allan also explains how to make particles collide to and bounce from the floor.
7. Bringing It Together (23min) – In this chapter rendering of the disintegration effect begins. Mental Ray is used for rendering and FumeFX version compatibility with Mental Ray is discussed. The displacement map setup for burning flesh that was covered earlier gets implemented here. Texturing of burned parts and ash particles is applied.
8. Creating Smoke (34min) – FumeFX is used once again. Smoke is created with a thorough explanation on parameters and settings – if you are unfamiliar with FumeFX, you will find this section very informative. Lighting and rendering for smoke is created and explained. Other extras that could be added to the effect are also discussed.
Halfway through the video, Allan turns to working on the fire sparks setup and creating an ember material shader. Material render settings are discussed, and sparks are once again adjusted to enhance the visuals.
At this point, most of the elements for the disintegration effect are ready for testing and rendering. Allan goes through various settings like motion blur, render elements and a Material ID pass.
9. Burn Shader (36min) – The disintegration effect is taken a bit further. Unlike what the video’s filename may suggest, this chapter is about creating the actual disintegration part of the effect.
Additions to the shader setup are made so that the character that was turned into ash finally fades away. A breakdown is given on the creation of the disintegration shader. Allan then adds another set of ash particles that are emitted from the disintegration area.
An especially good part of this section is the description of how to fix stray particles that go through deflectors. Allan makes particles stay where they should using new Particle Flow features available in Max 2010. Handling this type of situations and bouncing particles is discussed and I found this solution very useful.
10. Floor Impact FX (20min) – The last component of the disintegration effect shot is built. Floor impact particles are created based on the solution demonstrated in the previous chapter.
11. Fire Sparks (11min) – The process of rendering passes continues, Allan makes some more tweaks to the particles and prepares different versions of the scene for multi-pass rendering. There is no detailed discussion regarding the creation of rendering passes – which is understandable to a degree, since this tutorial is aimed at intermediate and advanced users. The creation process of some passes is skipped, be aware that this chapter is not a step by step tutorial on how to setup effect components for rendering.
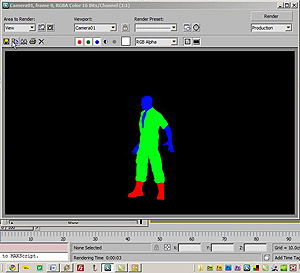
A Material ID pass helps isolate elements for
extra control in compositing
12. Masking Channels (23min) – Allan explains how to create an Object / materialID render pass. Usage of this kind of pass is shown in Fusion, going into how it can be used to separate different elements to obtain more control for color correction and other post-processing tasks.
13. Building Comp Tree (31min) – Different passes are now brought into Fusion. Diffuse, Ash, MaterialID, Sparks, Smoke and Flames passes – all of these are reviewed.
Allan shows extensively how to create a comp tree setup for the disintegration effect. He further explains different methods for color correction with masks. He experiments with corrections to the passes to see what could be achieved with different settings.
14. Illumination (19min) – Though the chapter’s name suggests otherwise, this video is about creating body flames. Additional texture animation is created and the author shows a workaround for FumeFX, because the software is currently unable to work with multiple UV sets for source texturing. A setup of body flames continues with FumeFX.
15. Lighting (24min) – In this chapter, procedural texture animations for the disintegration effect are completed. Creation and animation of the effect’s lighting is shown.
16. Final Compositing (52min) – Finally, everything is tied together in Fusion. In this lengthy and informative chapter Allan shows how to integrate flames and other passes he created earlier. Different components of the effect are evaluated and discussed extensively. Variations of the end result are shown, providing ideas for parameters and settings that could be changed, and how they would alter the overall look of the disintegration effect. Creation of different kinds of glows is also discussed, as well as heat distortions and flare-like effects. Color correction masks and passes are also discussed.
Summary
Even though this tutorial only focuses on one effect shot, it’s not at all boring or repetitive. In fact, there are so many components to this disintegration effect that things don’t get too dry to follow.
The whole production process is logical. Allan starts from one texture animation and builds everything on top of that, all the workflow stays under control and in structured shape. Particles, displacement animation, FumeFX fire and smoke are built on this foundation.
The disintegration effect contains many components. These are first fleshed out and then later refined. Compositing is shown in the final chapter, but also through previous videos during the creation of the effect components. This allows one to visualize the practical use of what is being added at each stage of production. A nice thing regarding the compositing sections is that Allan shows a good deal of variations, and how the look of a specific effect can be tweaked or changed. He makes modifications and then renders previews to display the results.
Another very positive aspect is that Allan explains why he does something, not just how. He also shares many tips related to subjects discussed on this DVD, and FX work in general.
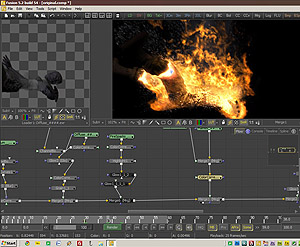
Compositing time! Putting passes together and adding glows in Fusion
Some users who are new to compositing and pass rendering might find sections dedicated to these topics a bit hard follow, but most viewers will receive a good overview of the process.
Particle Flow effects are all done step by step, which makes them easy to follow. The same goes for procedural texturing parts.
There is a lot to learn in this tutorial: how to create procedural texture animations, how to create working particle floor collisions with the new 3DS Max 2010 Particle Flow operators, how to modify speed and direction of particles with geometry, how to spawn particles and create fire from an animated mesh, and how to setup animated meshes for effects shots.
Files
The digital download version reviewed here arrived as a number of videos, downloaded from a server. The download contains 16 video files and a DVD cover, there are no scene files or rendered animations. So if you are going to follow the creation of the disintegration effect while watching the videos, you will first have to find a free or commercial rigged character for this purpose – if you are not able to create and rig a simple character yourself. Some people might find this as a downside. This fact is mentioned on Allan’s web site.
Editing
Editing is similar to previous tutorials by Allan McKay, you are watching what he is doing in real time, recorded by a screen cam. You will probably need to download and install the Techsmith codec if you don’t have it already installed (see link below).
Audio quality is good and audio level is consistent from one chapter to another. There is an occasional mobile phone buzzing noise but it doesn’t cause significant distraction.
The tutorial files don’t have any custom interface, something that many users will probably find to be a good thing.
There is no table of contents or any kind of booklet, but video files are mostly named logically. I didn’t find this to be a big problem, but it would have been a nice addition.
Conclusion
Content is roughly 60% particle animation and procedural texturing / shader creation while the rest of the content is FumeFX and compositing. Effect creation methodology and workflow is discussed extensively.
Some might think that one shot does not offer much content to work on or enough variation, but there are many components built here, and they can be used in creative ways. Many are very useful for non-creature and non-organic effects, too.
The end result is professional and good looking for a tutorial. If you are interested in learning how to create procedural texture animations for creatures and how to use Particle Flow with animated characters together with FumeFX, you most likely will find this tutorial informative.
The amount of content offered in the tutorial compared to the price is good and worth the purchase. As this is ”Volume 1”, most likely more ”Creature FX” tutorials will follow.
Related Links:
Allan McKay’s personal website
Turbo Squid, publisher of the DVD
Sitni Sati d.o.o., creator of FumeFX
TechSmith screen capture codec (TSCC)
Notes:
According to Allan’s website the downloadable version of the tutorial should be available for purchase from Turbosquid’s website, but it is also available from his own web page, www.AllanMcKay.com.
File format:
Video: TSCC 1000×624 15.00fps
Audio: MPEG Audio 48000Hz mono 128Kbps
File size varies from 100MB to 800MB, totaling 5.6GB
TechSmith screen capture codec is not supplied with the digital download version. See above link to get the codec.
About the author:
Olli Sorjonen is an experienced 3D artist from Finland, well known for his character work and studies of the human figure, his site can be found at www.CGMill.com.
Screen capture images courtesy of Allan McKay.

