Bond Patterns and Mortar
Of utmost importance to a tile map are the number and type of bonds available. MightyTiles’ fifteen patterns will be suitable for most circumstances with five stretcher bonds, English, Flemish, stacked, American, Gothic and many more. Unfortunately the plugin does not seem to be able to create bonds where a brick crosses the courses. This means herringbone and basketweave patterns are not currently possible, a pity since they are frequently used and difficult to create.
Once the basic pattern is set, a jiggle parameter subtly alters the position of the cross joints to break up the regularity of a too-perfect procedural pattern. This and many other elements of the map are based upon a random seed, to create a new variation of the material one needs to simply change this value. It’s a great feature if you need to use the map multiple times in the scene without spotting repetition. However, it is necessary to clone the material and then change the seed to achieve this. An option to randomise the seed by object would be really useful, so that the same material would take different random settings for each mesh it’s applied to.
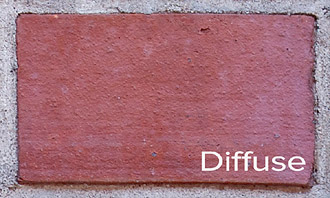
When creating images for use in MightyTiles they can either be cropped to include only the bricks or include a border of mortar. In the latter instance MightyTiles allows you to use the mortar visible in the brick bitmap, replace the bitmap’s mortar with a procedurally generated mortar using an alpha map as a mask, or blend the two. The size of the cross and bed joints can be controlled separately and if the colours are picked carefully the blend between existing and procedural mortar can appear seamless.
In addition to these settings there are controls to adjust the colour of the existing mortar, as well as a sophisticated set of options for the procedural mortar, including the ability to control the extent to which it contributes to the bump and displace output, controls for reflectivity, and the ability to set a separate specular map. This all adds up to an unprecedented level of control and flexibility to reuse and repurpose the tile library.
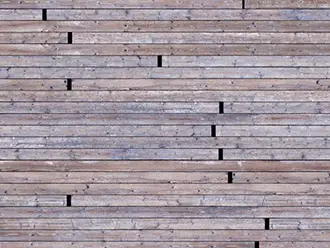
With the pattern and mortar set, the number of tiles is determined by setting the rows and aspect ratio. The latter can be used to adapt the patterns to other uses, for example a stretcher bond can easily become a Parquet floor. In the test scene created for this review, the technique is used to create the decking around the pool.
When applying MightyTiles to a rectangular surface the aspect ratio must be set to compensate for the map’s distortion. Thankfully it displays in the viewports exactly as it renders and is quick to update making the adjustment a cinch. As would be expected the aspect ratio scales both the bricks and the mortar equally, however when using it to create elongated planks the stretched mortar becomes a problem. The image illustrates the decking map with the same horizontal and vertical mortar setting. You can see that the elongated vertical mortar becomes much larger than the horizontal, this can be easily fixed by reducing the size of the cross joints but an option to scale only the bitmaps might be a helpful inclusion to aid the use of the plugin for this kind of use.
Tile Designer
MightyTiles comes with a small library of textures providing a good selection to get up and running. These are predominantly walls with up to twenty individual bricks included per set and each has its own diffuse, alpha, bump, reflection and displacement bitmap. In many cases these defaults may be enough. With a few added colour correct maps and some randomisation they can be used in a surprising number of circumstances. At the time of writing 8 sets are provided, but the author of the plugin has suggested this will increase to twenty or thirty free of charge, with premium expansion packs expected in the future.
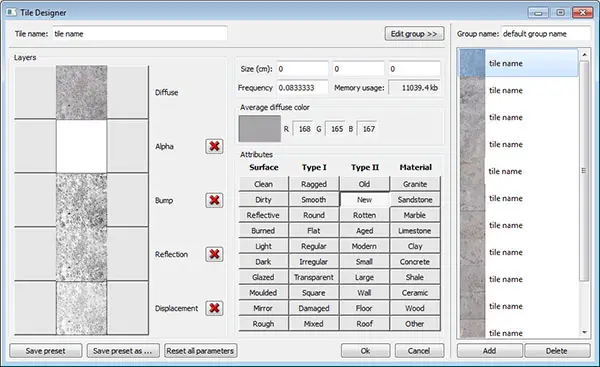
Pretty soon though you’ll need to use your own custom tile sets and that’s where the tile designer comes in. This is used to manage and create the XML files that describe a tile set. These are saved in a library location that can be configured from the settings to point to any network or local path. The tile editor can be set to automatically create relative paths for ease of sharing and use in a studio environment.
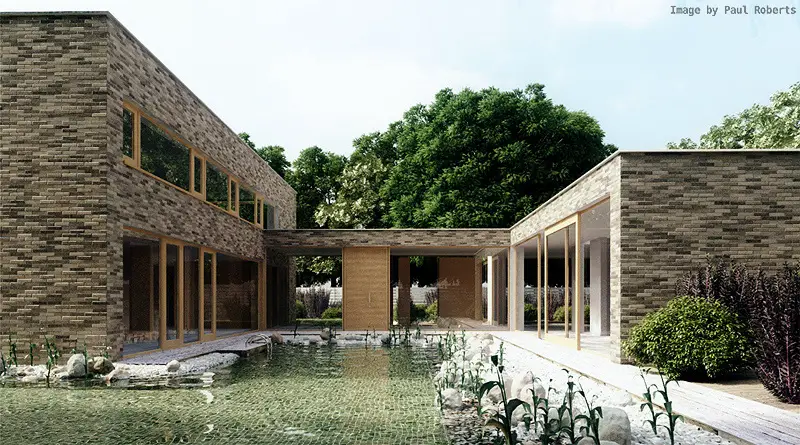
The test scene has a number of custom tile sets including the decking, the green tiles in the pool, and marble tiles inside the house. Conveniently, once created these are available to use in any future project, but creating them was not as painless as it could have been.
The biggest obstacle when using the tile editor was its inability to automatically load multiple maps. Each tile has up to five bitmaps: diffuse, displace, alpha, reflection and bump. To create a set first a new tile must be created then each relevant bitmap is selected and loaded individually. To create an average sized library of twenty tiles that’s 100 images loaded one at a time. Thankfully auto-loading images is being looked into for inclusion in a future update.
Despite this, the rest of the tile editor is easy to use and self explanatory, including a handy feature that allows you to control the probability of an individual tile appearing. There are a few settings that have no apparent function like the large attributes section, which according to Dieter Finkenzeller (the author of the plugin) is a “relic from ancient days”. But this doesn’t impair the functionality of the plugin.
Once you have an extensive library a handy feature is the ability to use multiple tile sets. Each set takes a frequency value that determines the probability of a tile being selected from that collection. This makes combining and controlling multiple tile sets very simple and saves from having to manually append or recreate them.
Adding Randomisation
MightyTiles has a large number of randomisable attributes, so many in fact that it really isn’t necessary to have a huge number of bitmaps to create a highly variegated material.
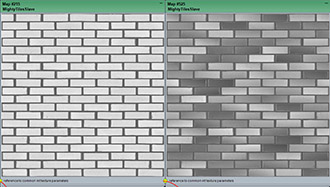
Displacement, bump and reflectivity can all be randomised by setting a maximum output and selecting a deviation range from that value. A great feature that I haven’t seen elsewhere is the ability to tilt the tiles on the x and y axis so that a corner might protrude from the wall. In the example map on the right you can see a displacement before and after applying these settings. In the right hand version there is significant diversity in the displacement height and gradients across the tiles that create the tilt effect.
It’s a personal preference, but I would like to see minimum and maximum settings instead of a baseline and variation, especially in the tilt controls. This would allow for accurately controlling the angle, rotating on a single axis or restricting to a positive or negative value. It might even allow for interesting effects like dogtooth patterns in brickwork.
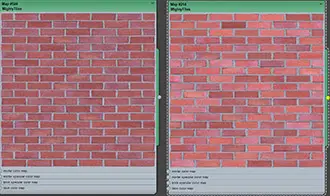
In addition each brick can be moved, rotated and scaled within the boundaries defined by its mortar. The hue, saturation and value of the diffuse map can be subtly randomised to add further interest as in the example on the right.



Thank you very much Paul! This is really a great article about MightyTiles with lots of details and explanations.
Really nice review! Thanks Paul 🙂
Nice review, could someone explain which are the most important differences between Migthy Tiles and Walls and tiles from VIZPARK? im planning on buying one of them and donow if they are really similar or not (since prices are differents)
thanks