User Interface
First and foremost, TP can be an overwhelming experience to someone who has never used it. Much like Particle Flow that comes standard with 3DS Max now, TP operates within its own schematic editor of sorts, where users can create and connect various nodes that allow for the creation and manipulation of particles, and particle groups. For new users, TP’s major downfall is the steep learning curve associated with trying to learn how it works. With a tool that offers so much flexibility, one would expect there to be some difficulty in learning how to use it.
The new TP5 help manual may seem like a small change to TP5, but in my mind it is a change for the better and an indication that Cebas realizes more and more people are beginning to use their software. Previous releases of TP did not come with a standalone help manual, so you would have to go to the Cebas website, find the support section, create a username/password, wait for your account to be approved, then search your way through various links to get at the information you were looking for. It was a clumsy and tedious way of searching for an answer that should normally take a few mouse clicks.
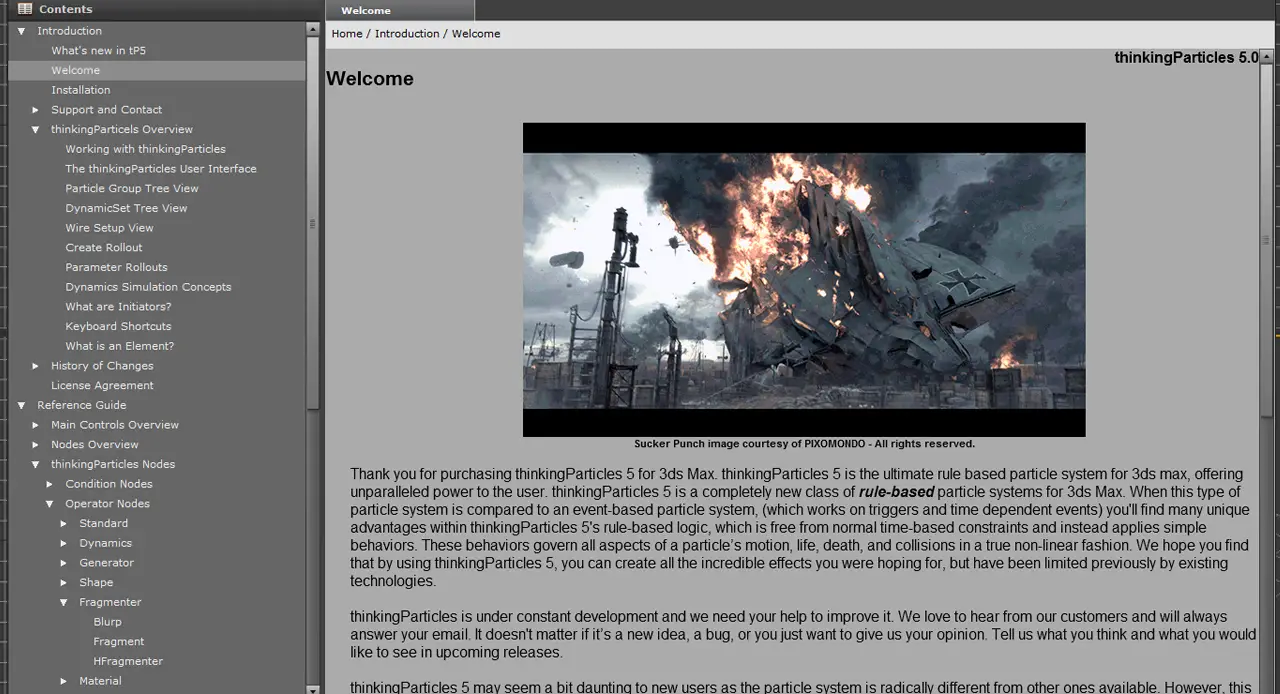
The new ThinkingParticles help manual
Upon installing TP5, I was very happy to see that Cebas took the time to properly document their tools, and present them in a way that was easy to read and understand. I was now able to open an .exe file which contained the help manual and simply search for what I was looking for. For those just starting to learn TP, this will significantly help cut down the time wasted hunting for answers.
The addition of new hotkeys to the UI also helps in day-to-day production. Something users will want to remember when using these TP hotkeys, is to have the Keyboard Shortcut Override icon turned on. Without the override enabled, you will not be able to do simple copy/paste/delete functions of nodes in the TP interface.
Another really simple addition to the TP Standard Helper nodes is the Comment Node. This node offers a simple way to store text in your TP setup that can be used to describe your setup, or anything else you wish. The Comment Node can be a great way to let another user know exactly what is going on in your scene, should you have to hand it off to someone else.
Also of note, TP has improved the speed with which it handles large scenes comprised of many particles and dynamic sets. As mentioned in the overview, Cebas has invested some time into optimizing the code behind TP, in hopes of speeding up viewport interaction. Even though much of the improvements claim to be applicable to the Nitrous display drivers for 3DS Max 2012 and above, I did notice a difference in 3DS Max 2011 when compared to TP4. General handling of scene files seemed very smooth when scrubbing through particle systems, enough so that I was able to get a sense that things had been made faster with this latest release. For the more complex setups, it still makes sense to cache out simulations but overall there is a noticeable speed increase in the viewports.
Bullet Physics
Being someone who creates a lot of particle and dynamics simulations in the run of a year, Bullet integration was my most anticipated feature. I had first heard of Bullet a few years ago while watching a SIGGRAPH presentation, and I was amazed at what I saw. Thousands of rigid bodies colliding together in realtime, complex soft body dynamics, and rope simulations. It has been a long time coming, but now 3DS Max users have a solid implementation of Bullet, that in my mind, performs like a dream. TP5 introduces Bullet Physics as its new, main physics engine. Previous to TP5, users had the option of using PhysX, ShapeCollision, and SC physics engines to handle collisions, and interactions between particles and groups. Each of these three options had their pros and cons when it came to running dynamics simulations. With the new Bullet engine, dynamics and simulations run much faster, and are more accurate than its predecessors.
Bullet Physics in TP5, can be broken down into a few main components: the Bullet Physics engine itself, BTVehicle, BTRope, and BTJoints.
Bullet Physics Engine
The Bullet Physics engine is the environment in which dynamics or simulations take place. The engine has set properties, or interpretation of properties, which dictate how objects interact with each other and behave. So now when you select your particle groups, you have a new option to use Bullet Physics as your dynamics engine. Once made active, you can control how Bullet uses the group when simulating; you can simulate using the shape mesh or proxy mesh, (i.e. box, sphere, cylinder), treat the group as a rope object, control the amount of friction, stiffness, and dampening, etc. This is really convenient as it allows you to create multiple Bullet objects in one scene. So you can have rigid bodies interacting with a rope, for example.
The second use of the Bullet Physics engine comes into play once you are ready to simulate your dynamic sets. Common practice when creating dynamics simulations, is to create your particles, apply forces, rules, and conditions, and then lastly simulate them through some sort of collision set which allows them to interact with each other.
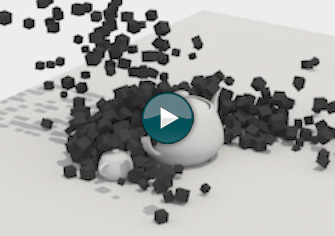
Bullet Physics in action
The example video I have made shows a simple viewport grab of some particles being born, and piling up on a platform, while a teapot moves through them. This scene uses a simple Bullet Physics setup that took me no longer than five minutes to get up and running. I was able to give both the ground geo and falling boxes unique properties through the Bullet rollout associated with each particle group. Once decided upon, I sent both groups through the Bullet Physics node to simulate, and pressed play on my timeline. What you are seeing in this video is a realtime capture of my screen as the animation plays through. Pretty impressive when you consider what is going on. 3DS Max 2011, running under a Nvidia Quadro 2000 card, 300 particles/sec, full collisions and interaction between boxes, teapots, and ground plane.
The second part of the video is a rendered version of the same setup, and the last part is a simple test using spheres falling into a bowl. The last test was cached out for faster playback, as it uses many more particles and playback in the viewport was to slow to process.


