BTVehicle
BTVehicle is the second component of Bullet which provides users with a fully dynamic vehicle simulator inside TP5. I had seen this feature showcased at SIGGRAPH 2011 and was really impressed with what I saw: a fully procedural vehicle simulator that had a controllable suspension system, was capable of working with trailers, and could drive along a pre-defined path. Seemed like something that would be a lot of fun to play with. And it is.
This is by far the most enjoyable feature of TP5. In order to set up the car, you start with the main body of the vehicle, and then parent the wheel(s) to it. Next step is to create some particles, and then create your BTVehicle node in TP and add your vehicle. You can then control the speed, steering, braking, wheel rotation, and suspension axis. TP is smart enough to know that your car has wheels linked to it and will determine the physics based on how it is configured.
It took, however, a bit of playing around to figure out how to set up the vehicle properly. I started with a simple 4-wheeled car that had the wheels linked to the body, and when I chose my car in the BTVehicle node, I noticed that wheels were turning the wrong way: what I thought were my front wheels actually turned out to be my rear wheels. After some fiddling with the issue, I found out that the wheel order seems to be based on the order in which the wheels are linked to the vehicle body. Once I linked each wheel, one by one, starting with the front two, and then moving to the rear, the problem was fixed. It would have been nice for Cebas to include some sort of video tutorial, or step-by-step process documenting how to set up the vehicle properly.
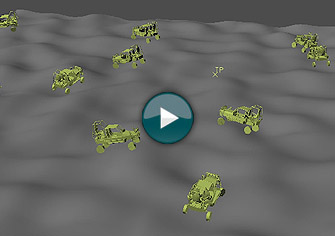
That aside, once the vehicle was ready, it was as simple as creating a few particles, creating some sort of ground for them to drive on, and then letting them go. As you can see in the accompanying video, you get some really nice dynamics in the suspension of each vehicle. As they drive over the landscape, the subtle changes in topography are reflected, and you also get some nice collisions when vehicles hit against each other. One thing that can be tricky is getting your vehicles to stay above ground. Depending on your scene scale, the mass, center of gravity, and speed of each vehicle, you may run into issues with your vehicles sinking into the ground. This issue is acknowledged in the help manual and Cebas offers some insight into how to resolve the problem by adjusting various parameters. Along with the BTVehicle node, comes the BTVehicle Data node. This node offers even more functionality and allows you to procedurally adjust the vehicle parameters at anytime.
Overall, the vehicle simulator is a well thought out tool that offers a lot of control in determining how your vehicles will behave when simulated. Full rigid body dynamics that include a working suspension system is a nice thing to see driving around in your viewport. The only thing missing is a good tutorial that outlines how to properly set up your vehicles before bringing them into TP. For someone who has never used TP before, it might be a little confusing trying to decipher what is going on.
BTRope
The next feature that comes as part of Bullet is BTRope. This is a soft body physics object that allows users to create fully 3D dynamic ropes from 2D splines, between two particles, or between objects and particles. You simply create your splines, or choose your ‘from point’ and ‘to point’ and the BTRope node does the rest. The rope is generated procedurally based on the data you supply it with. The great part about BTRope, is that it can be generated procedurally meaning you can both create and break ropes based on threshold distances, and other particle data.
The process of creating ropes is pretty straightforward. As you can see in the video, I simply add the BTRope node and then use a simple Point3 node for both the From and To position, this allows me to specify exactly where the rope object starts and ends. The BTRope node also offers some great parameters that users can adjust to customize the behavior. You have control over the thickness, the amount of steps used to create the rope, dampening, stiffness, and breaking controls.
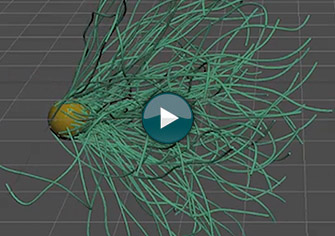
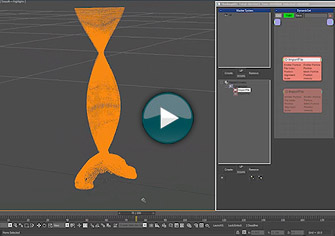
BTRope also allows for the use of forces as well. So when creating ropes, you can use gravity, wind, and dynamic collisions to interact with your rope objects. Since ropes can be created between objects or particles, you can also create some really interesting effects. Here is a a simple test I created from one of the scene files that comes with the TP5 install. I created some ropes between two points, I locked one end of the ropes to the sphere, and then ran a wind spacewarp over them, to give them a tentacle look and feel in their movement. The video you see is a realtime viewport preview so you can get an idea of how fast it is.
You can also create some more complex setups using joints where you can link, or joint your ropes to other objects, and then run them through a Bullet Physics simulation using other particles as collision objects. Again, this plays out very fast in the viewport and you can adjust parameters in realtime. Of course, the more dynamic sets you have and the more particles you have, the slower the playback will be.
BTRopeData is another node that comes along with Bullet. This node is similar to the BTVehicleData node, in that it gives you even more control over how your ropes behave.
BTJoints
The final feature that comes as part of Bullet, is the BTJoint system. This offers you seven different types of joints:
0 = Point To Point
1 = Hinge
2 = Cone Twist
3 = Slider
4 = D6
5 = D6 Spring
6 = Rope Anchor
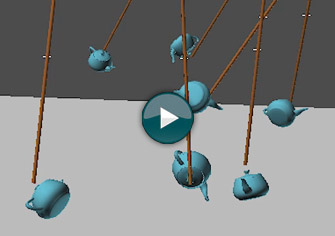
Using joints allows you to connect particles in different ways. For example, you could use the Rope Anchor joint to attach various objects to a rope object, and they will lock to the rope as the ropes moves around. As you can see in the video, a simple setup that used some rope objects with teapots was jointed to the bottom. I have a wind force that is gently blowing the ropes around, and the teapots follow suit. Other joint types allow for sliding doors, swinging doors, twisting joints that would be suitable for ragdolls or limbs, and the D6 joints which offer total control over which axis you may or may not want locked. Lots of great possibilities with this jointing system that comes with Bullet.
Import Node
The addition of the ImportFile node to TP5 will be a welcomed tool by those who use Realflow .bin files, or Krakatoa .prt files. Having this additional compatibility gives users even more options to play with. The node simply imports either the .bin data, or .prt data, and converts it to particles. You can give birth to more particles from this data, use various parameters such as density and viscosity for Realflow .bin files, as well as velocities, position values for both .bin and .prt data.
In the illustrating video you can see I have created a simple fluid sim in Realflow, and have brought that in to TP via the ImportFile node. You can then see the visual representation of the Realflow simulation. In the second half of the video, I have created a Krakatoa .prt sequence, and have imported that into TP. Again TP does a great job of letting me see exactly what is going on, even when there are thousands of particles in the viewport.

