Introduction
[specs-box]
PhotoScan is a photogrammetry software developed by Russia-based Agisoft that allows you to generate point clouds data, 3D models and their corresponding textures from a series of photos. It’s an easy to use and affordable alternative to laser scan solutions.
I’ll be reviewing the software from the point of view of a 3D/VFX artist.
Let’s see what PhotoScan has to offer.
Workflow
In order to create 3D models the first thing you must do is to import a number of images from the object or scene into PhotoScan. The software supports the following file formats: .jpg, .tif, .png, .bmp, .exr, .pgm, .ppm, .mpo and .seq. The basic workflow is pretty straightforward:
- Add Photos
- Align Photos
- Build a Dense Cloud (in the case you need more details in your mesh)
- Generate Mesh
- Build Texture
Each step offers you to change the base settings up to your needs. The more photos you use, the more detailed your mesh
will be. Also, an important aspect to keep in mind is that your computer resources will influence the complexity of the mesh you can generate. As it’s an offline process, the more RAM you have the more polygons you’ll be able to get in your object. The results will be even better if you have computers connected together via a network.
Even though the workflow is rather simple, one must learn a few tips
for shooting the subject one wants to acquire in order to get quality
results. It’s easy to get frustrated otherwise, so make sure you read the shooting tips and the help file before using the software. You’ll avoid bad
results and frustration, something I experienced when I first used
PhotoScan a few years ago.
Capturing 3D objects
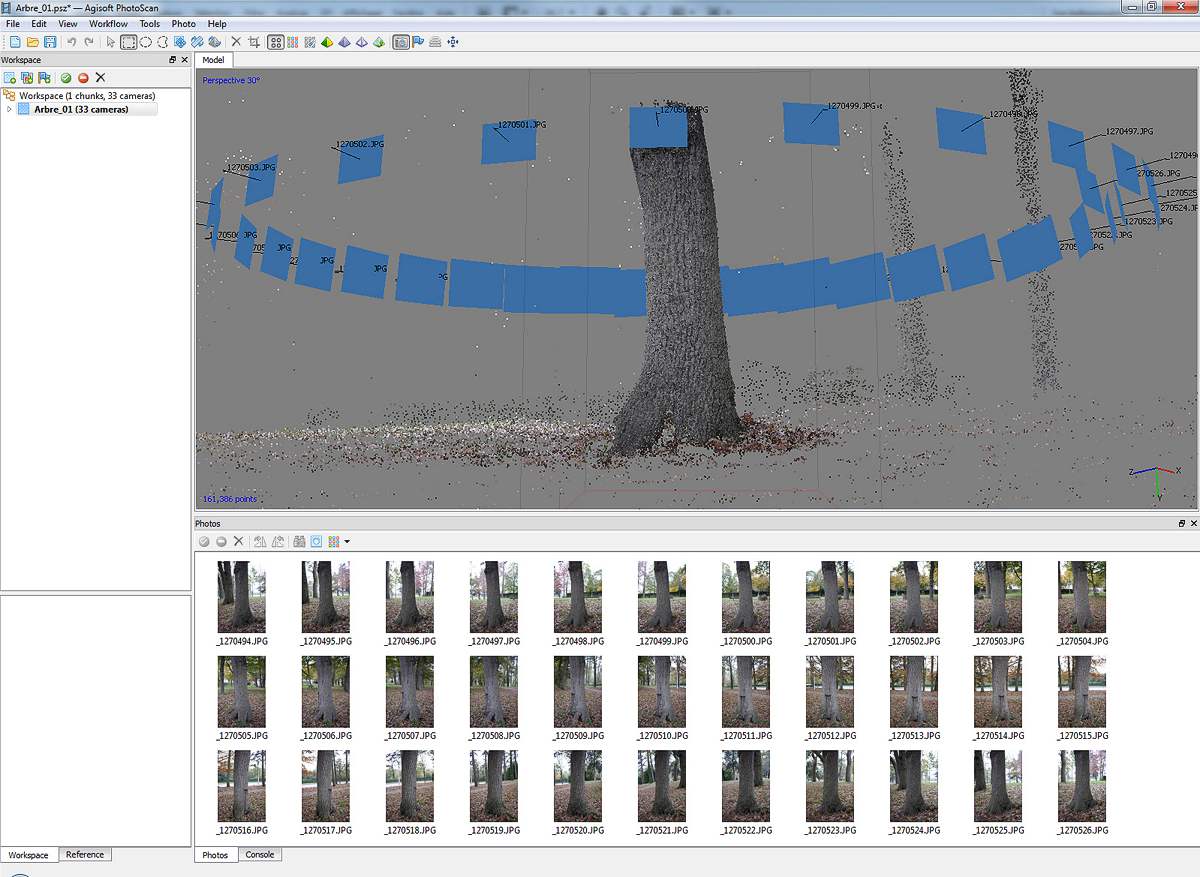
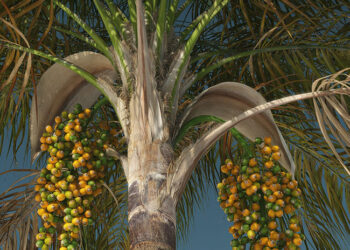
Let’s go over the different tools offered by the software through a real project: the acquisition and reconstruction of a tree trunk. For this project I took 33 pictures of the trunk shot all around its base. After the alignment process you can see blue rectangular shapes representing your camera position in 3D space, and the initial point cloud. Also, a bounding box appears where there is a bigger gathering of points in the cloud. The next steps of the process will be using that
area only. You can resize and rotate it to include your mesh. Therefore
all the surrounding trees, leaves and objects will be ignored.
The mesh can be generated from the point cloud that we just created, if
it lacks detail it means you don’t have enough data to be used in the
mesh generation process. If that is the case, you can choose to use the
next step in the process: the
generation of a dense point cloud. This will be the longest step for
each of your scans, indeed, for the tree trunk project it took
approximately 6 hours on a i7 2600K @3.40GHz with 16Gb RAM.
Once this is done you can choose between sparse and dense cloud options
for mesh building. If you find that there are some parts of the mesh
that you won’t need, you can easily remove them with the rectangle,
circle or lasso tools. The gradual selection option lets you select polygons by their
size or by connected component size. If your mesh isn’t perfect and has
tiny holes, there is also an option to close them, controlled by a slider.
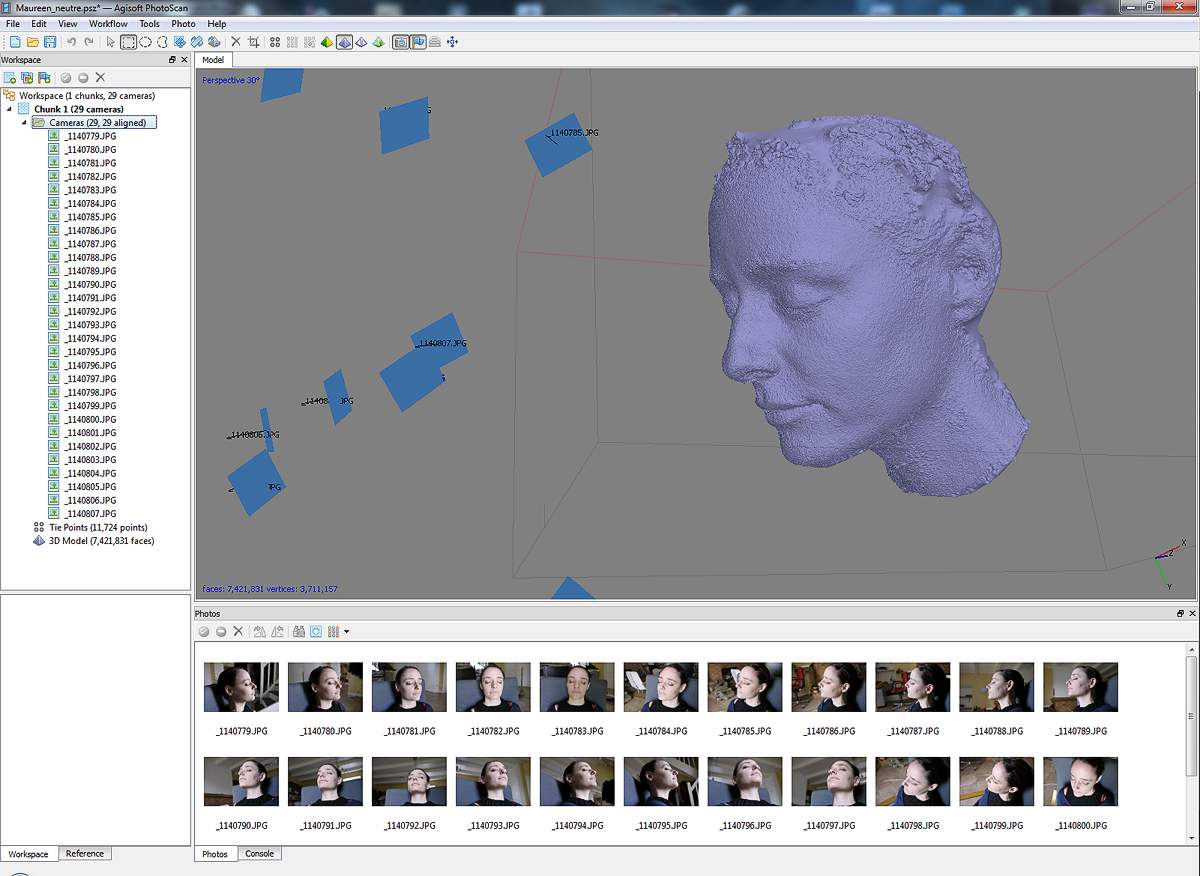
A few words on the quality of the meshes generated by Photoscan: they usually have a great amount of detail and are highly accurate with respect to the original model. But this only holds true as long as you have done a good photo shoot. There are some exceptions: shooting inanimate models (trees, rocks, objects, etc.) is quite easy and can be done using a single camera. If you want to shoot a live model, however, like a human body, face, animal, etc., you’ll need a camera rig that takes all the pictures at once. Why? Simply because live models breathe and have subtle motions, so no matter how fast you are at shooting photos with a single camera, your photos will not be consistent and the generated mesh will end up having 3D noise.
Depending on your needs you can use the decimation option to drastically reduce the amount of polygons while keeping the shape of your mesh. This is welcome when you need to do a retopology process in an external 3D application.
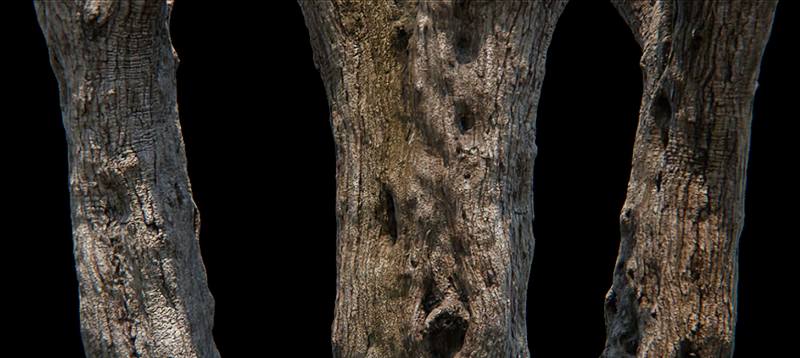
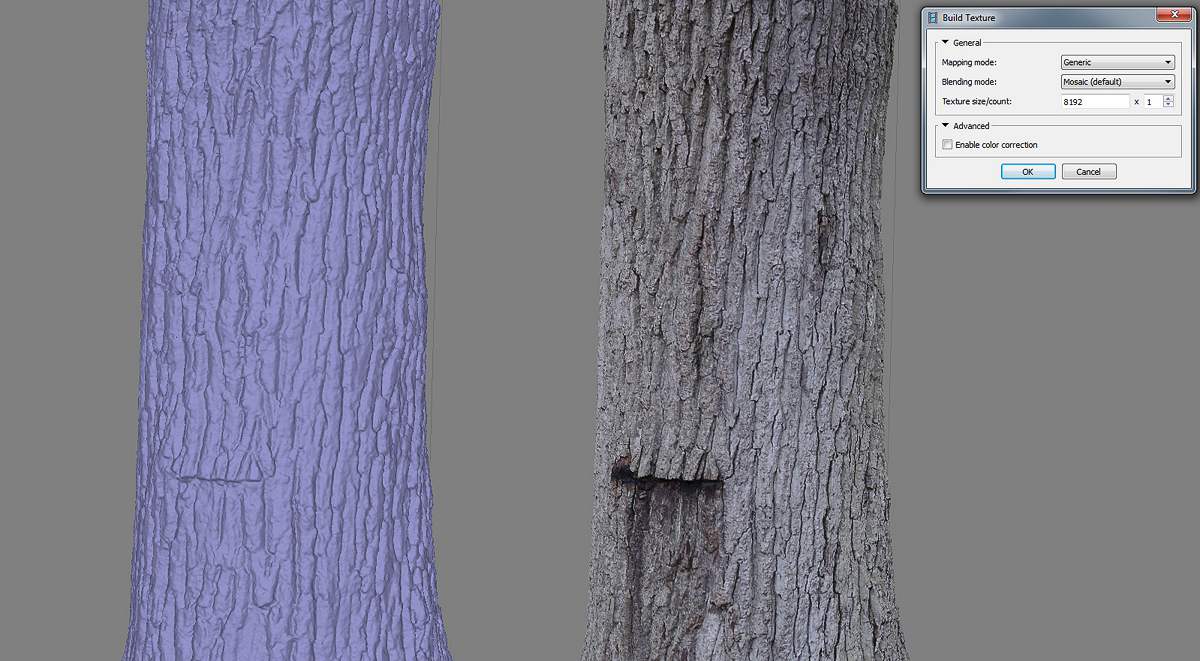
Like the other processes, creating the texture is mostly automated. All
you need is to set the texture size, choose a mapping mode (the
“Generic” option gives good results 90% of the time) and hit OK. That’s
it, we have a realistic CG
tree trunk from only 33 pictures.
Maybe you’re not a tree lover like me and would prefer to use the
software to scan really huge
areas from a plane. This is possible by switching from the Arbitrary to
the
Height Field Surface type in the mesh building process. With this
method, you’ll get
an elevated terrain geometry as a result.
Generating 3D scans is an interesting process in itself, but the output is usually meant to be used in external applications. For this, one has several choices for exporting meshes:
In the File menu:
- Export model as .obj, .3ds, .wrl, .dae, .ply, .stl, .fbx, .dxf (Autodesk DXF
Polyline and 3DFace), .u3d, .pdf and .kmz for Google Earth. There you can shift the position
of your object in X,Y and Z space, export the cameras as well, and
chose between jpg, png, tiff and exr formats for the texture. - Export tiles as .tls file
- Export points as .obj, .ply, .txt, .las, .e57, .u3d, .pdf, .zip and .oc3
- Export orthophoto which works like an advanced print screen function and can be exported as .tif,
.png and .jpg - Export DEM for elevated terrain geometry
There’s even an option to upload your model to Sketchfab or Verold.
In the Tools menu:
- Export texture as .jpg, .tif, .bmp, .png, and .exr
- Export Cameras as .xml, .out, .chan, .txt (for Boujou and Omega Phi Kappa), .ptb, .dat, .orn, and .prj
- Export Markers
- Export Matches as .dat, .txt, .ptb
- Export Masks as .png
- Export Panorama


It’s a great bit of software
this video is really helpful getting the best out of it as well.
https://vimeo.com/98638688
Thanks for the tip, Steve. Great tutorial. We’ve added the link at the end of the review. It will help many people.